RabbitMQ는 메세징큐 기능을 수행하는 오픈소스이다.
카프카와 동일한 기능을 제공하는 오픈소스 제품이다.
이번 글에서는 Docker로 RabbitMQ 이미지를 다운받아 실행하여 RabbitMQ에 나와있는 튜토리얼들을 수행해보려고 한다.
https://www.rabbitmq.com/getstarted.html
여러 언어 중에 Python을 선택해 보았다.
1. 사전 준비 사항
우선 위 실습을 따라하려면 사전에 RabbitMQ가 5672 포트로 설치되어야 한다.
나 같은 경우는 Oracle Linux 장비에 Docker로 RabbitMQ를 실행하였다.
1-1. Docker로 RabbitMQ 다운받아 백그라운드로 실행
| root@master:~# docker run -it --rm -d --name rabbitmq -p 5672:5672 -p 15672:15672 rabbitmq:3.9-management Unable to find image 'rabbitmq:3.9-management' locally 3.9-management: Pulling from library/rabbitmq ea362f368469: Pull complete 8128e02f0caa: Pull complete 190ad14731bd: Pull complete 77793ffcdff3: Pull complete 2ded75d28575: Pull complete 38fe6cea12ab: Pull complete ec228f486d8e: Pull complete 6e93459f9f24: Pull complete 1a076196fb8b: Pull complete 975e2d61b91e: Pull complete Digest: sha256:821c31bdb35240822e9a7b95eb57e2aaa9590dc367b0598b58efd15fb037fc8c Status: Downloaded newer image for rabbitmq:3.9-management |
1-2. Python3 설치 및 버전 확인
| root@master:~# sudo apt-get install python3 .. root@master:~# python3 --version Python 3.8.10 |
1-3. AMQP(Advanced Message Queing Protocol) 사용을 위한 PIKA 라이브러리 설치
파이썬에서 메세징 큐 프로토콜을 사용하기 위해 PIKA 라이브러리를 사용해야 한다.
| root@master:~/python# apt install python3-pip Reading package lists... Done Building dependency tree Reading state information... Done ... root@master:~/python# pip install pika Collecting pika Downloading pika-1.2.0-py2.py3-none-any.whl (154 kB) |████████████████████████████████| 154 kB 9.8 MB/s Installing collected packages: pika Successfully installed pika-1.2.0 root@master:~/python# python3 -c 'import pika' > 아무런 메세지가 없다면 정상적으로 pika import가 된다는 뜻 |
2. Python 소스코드 작성
2-1. 메세지 제공자(Producer)
- send.py
| #!/usr/bin/env python import pika connection = pika.BlockingConnection(pika.ConnectionParameters(host='localhost')) channel = connection.channel() channel.queue_declare(queue='hello') channel.basic_publish(exchange='', routing_key='hello', body='Hello World!') print(" [x] Sent 'Hello World!'") connection.close() |
> 1회성으로 메세지를 보내고 연결을 끊는다.
2-2. 메세지 소비자(Consumer)
- receive.py
| #!/usr/bin/env python import pika connection = pika.BlockingConnection(pika.ConnectionParameters(host='localhost')) channel = connection.channel() channel.queue_declare(queue='hello') def callback(ch, method, properties, body): print(" [x] Received %r" % body) channel.basic_consume('hello', callback, auto_ack=True) print(' [*] Waiting for messages. To exit press CTRL+C') channel.start_consuming() |
위 예제의 그림은 아래와 같다.

- Producer가 메세지를 hello라는 큐에 메세지를 담고 Consumer가 해당 메세지 큐에서 메세지를 read하여 가져가는 형식이다.
* 소스코드에 대한 자세한 설명은 다른 블로그에도 잘 정리되어있다.
https://blog.storyg.co/rabbitmqs/tutorials/python/01-hellowolrd
3. 메세징 큐 테스트
테스트에 앞서 먼저 Consumer 쪽을 실행하여 메세지를 받을 준비를 한다.
| root@master:~/python# python3 receive.py [*] Waiting for messages. To exit press CTRL+C |
이후 Producer 쪽에서 send.py를 실행하여 메세지를 보낸다.
| root@master:~/python# python3 send.py [x] Sent 'Hello World!' |
Consumer쪽 메세지 확인
| root@master:~/python# python3 receive.py [*] Waiting for messages. To exit press CTRL+C [x] Received b'Hello World!' |
> Hello World!라는 메세지가 Consumer쪽에 찍힌다.
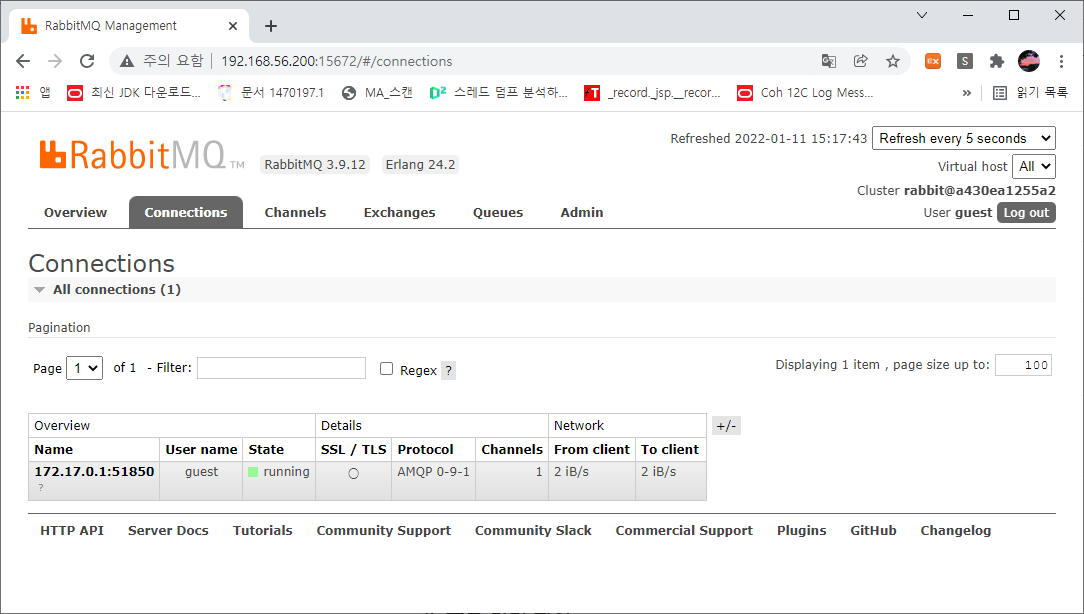
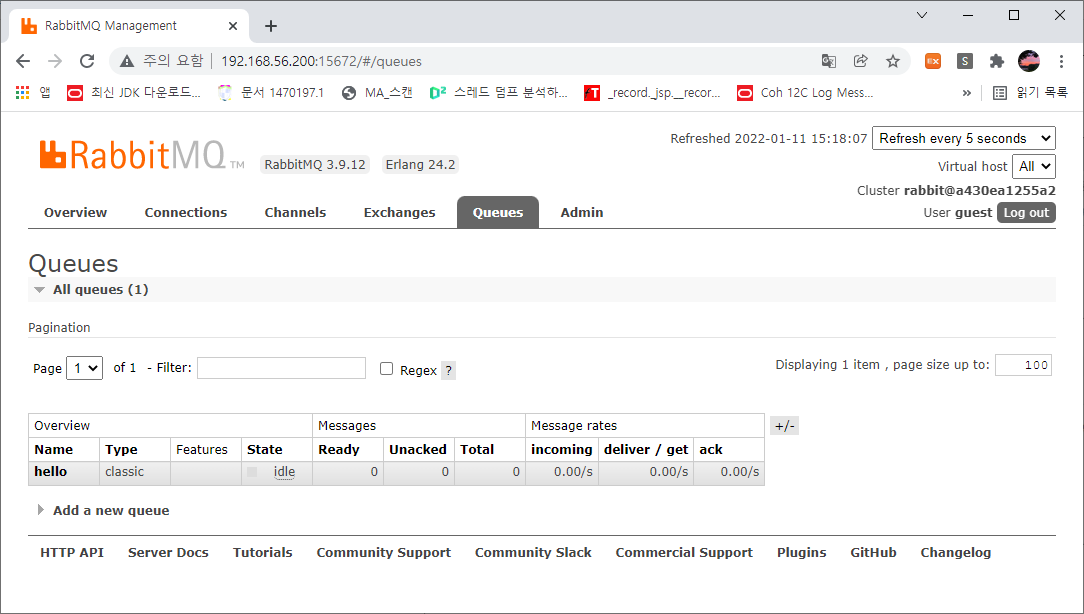
4. 콘솔 화면 확인
http://192.168.56.200:15672
id : guest
pw : guest
콘솔 화면에서 커넥션 상태와 메세지 큐 상태
해당 프로세스에서 사용중인 FD, Socket, 메모리 등을 모니터링 할 수 있다.

'오픈소스 > RabbitMQ' 카테고리의 다른 글
| [RMQ] Python으로 배우는 RabbitMQ 튜토리얼(6) - RPC (0) | 2022.01.20 |
|---|---|
| [RMQ] Python으로 배우는 RabbitMQ 튜토리얼(5) - Topic (0) | 2022.01.20 |
| [RMQ] Python으로 배우는 RabbitMQ 튜토리얼(4) - Routing (0) | 2022.01.18 |
| [RMQ] Python으로 배우는 RabbitMQ 튜토리얼(3) - Publish/Subscribe (0) | 2022.01.12 |
| [RMQ] Python으로 배우는 RabbitMQ 튜토리얼(2) - Work Queue (0) | 2022.01.12 |


